Dishonored Statue in Minecraft Easy Minecraft Statues Graph
Sometimes a certain kind of build is just completely undone without adding some kind of extra detail to it.
Statues can be used anywhere and for any purpose. They can make a good piece in the center of a courtyard, along a hallway or path. They can even be used to represent a patron of your Village and make it a symbol of protection.
It is all about deciding the size of the statue you will be needing and figuring out a shape. You can really get creative with the designs!
Small Statue Designs
Small statues can be much trickier to build than large statues, believe it or not. Because they are limited in size, you really have to get creative.
The simplest of "statues" you can make for an exceptionally small space is an equipped Armor Stand.
Armor Stands are pretty small and don't take up a lot of space.
This works very well in Bedrock Edition Minecraft, because you can change the pose of the Armor Stand. A pose makes them seem more dynamic and interesting.
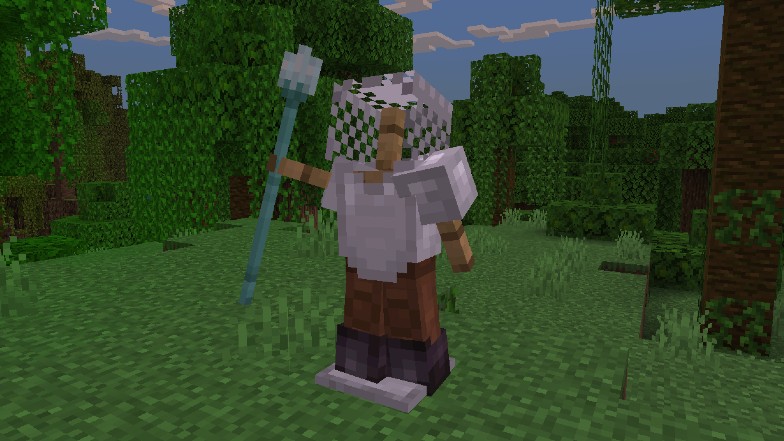
Other statues, albeit small, will be taking up much more space. Always keep in mind that you will need at least 4 blocks of height to fit a statue in any space. On average, most of my designs are about 5 blocks in height.
Not giving the statue a base will save you space.
For the first design we will start with a Grindstone. This block makes it look like our statue has small legs.
Any block such like that or a Cauldron can be used as legs for a small statue. Feel free to switch them up as you see fit.
I will place a Hopper and Anvil for the body, which will give it the shape of a torso. For the head, I almost always use either an Observer or Carved Pumpkin as they already look like they have a face. If you have Heads to spare, you can use those too.
Two Hoppers on each side of the Anvil will look like shoulders. All that is left is adding a Blackstone Wall block for arms.
You can have fun with the arms. You can have the arms just hanging or make them hold something.
My statue is holding an Iron Bar pole. I also gave him a "hat" using a Stonecutter.
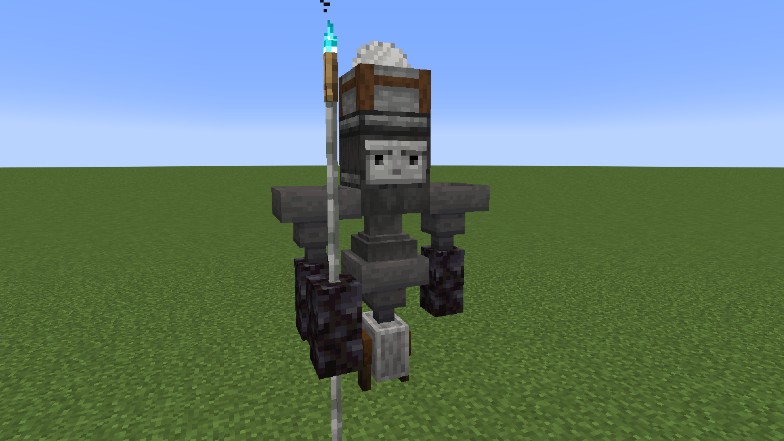
The most fun statue designs are simply using all these same blocks to mix them and make different body shapes.
Here is a few of my other designs you can freely use! These work great in mansion courtyards.
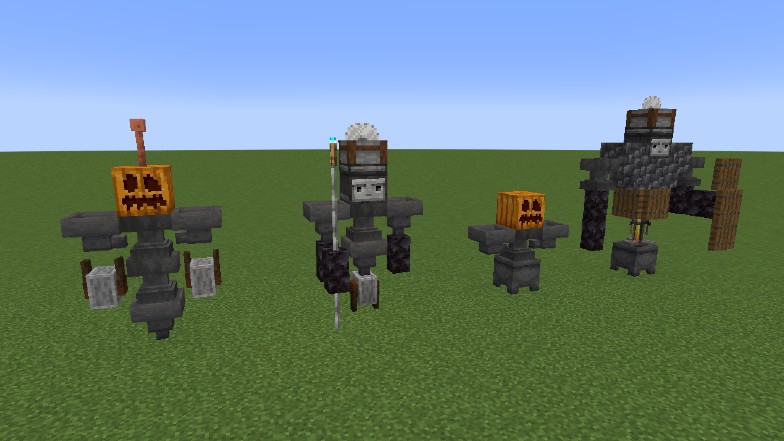
Alternative Statues
Statues don't have to be confined just to pedestals and gardens. A statue can also be a piece of decoration on the wall. These would also be small, if not smaller than regular statues.
You can try to make things like mounted animals or miniature ship models.
To make a simple moose or deer design on the wall all you need is Spruce and some Fences and Gates.
Put two Spruce Blocks on the wall with oppositely turned stairs on top of them to make the head shape. Then use Oak or Birch Fences to make the antler designs. With the antlers you can go as big or small as you want.
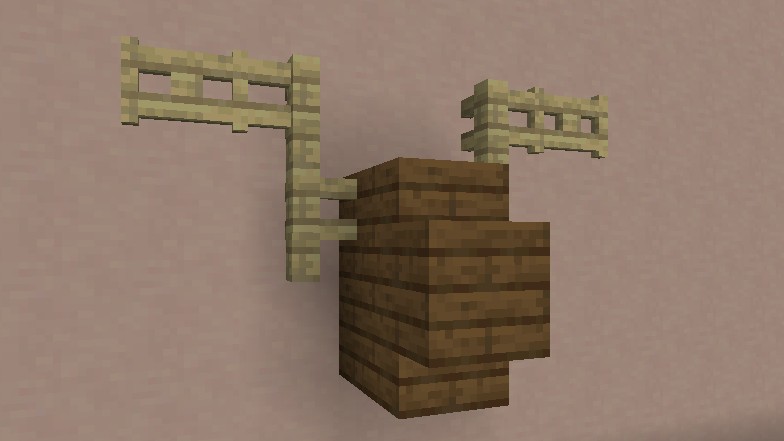
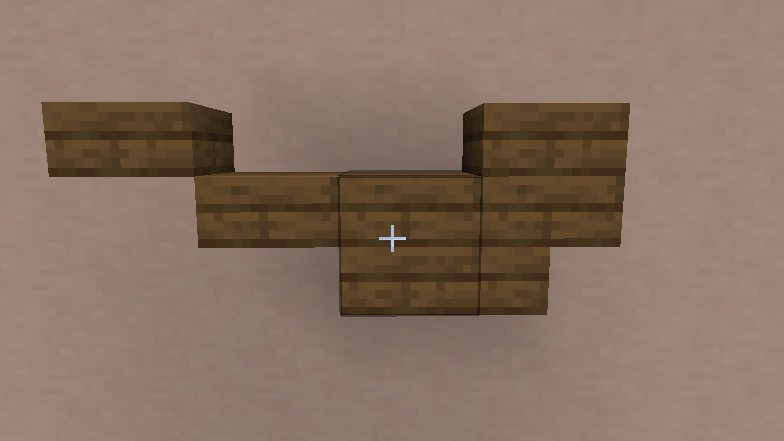
To make a miniature ship model you follow a similar process of using Wooden Stairs and Slabs together to make the shape.
For this design I put a Spruce block with an upside down Stair to its side. On the Stair I added a single Spruce Slab, and then two more on the opposite side.
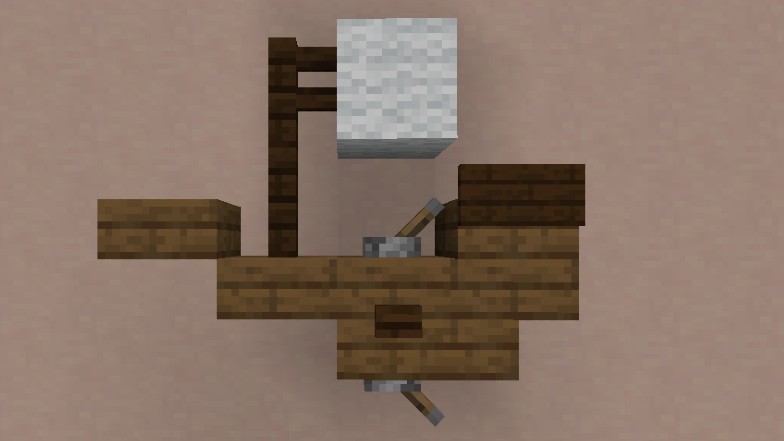
The details I made using a single Dark Oak Sign and Button and 2 Fence Posts with Wool on top.
The Levers are there to act as steering devices on the ship.
In a way, this particular design mimics our small ship design building techniques by utilizing blocks like Signs and Trap Doors.
Building Medium Statues
For medium statues we can have much more liberty in using chunkier blocks.
We can freely use full Blocks, Stairs, and Slabs. When there is enough space these statues look particularly nice with an included base. Think of it like a pedestal to put them on top of.
These statues look good decorating cities and large builds.
For a start I will build a mock base for these statues, just so I have an area I can work in. The pose I am going for is going to be a kneeling and walking person, just to make it dynamic.
We will start from the legs. Two Stone Brick stairs will be the feet.
Place them 6 blocks apart from each other, facing opposite directions. Place solid blocks behind each of them and start building up the legs gradually. For demonstration I switched up the materials so you can see where the Stairs and solid Blocks are.
Otherwise, this statue is made from Stone Bricks.
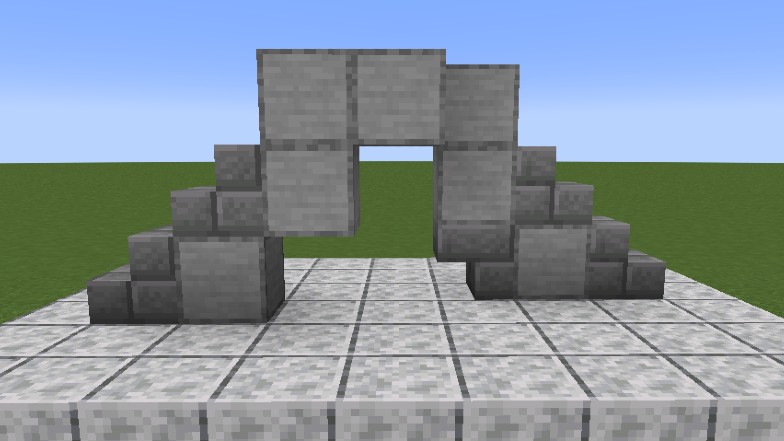
Where the legs meet is where we will start building the body.
The body will rise above the extended leg by 2 blocks in a width of 2 by 1 blocks. The shoulders will be placed on the sides of this shape, made out of Chiseled Stone.
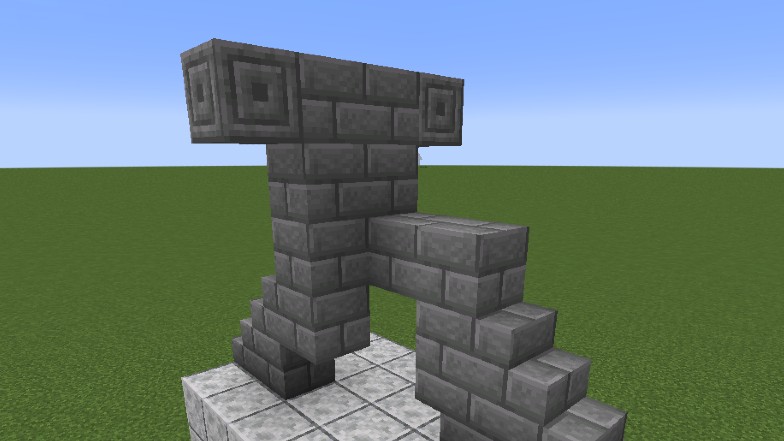
Now, we can build the head and arms. For the head I use Smooth Stone blocks and Slabs, making it look slightly bent.
The arms I make out of Stone Brick Walls. One arm will be extended straight down by 2 blocks, while the other is extended forward by 3 blocks, with an upside down Andesite Stair on the end. This is the statue's hand.
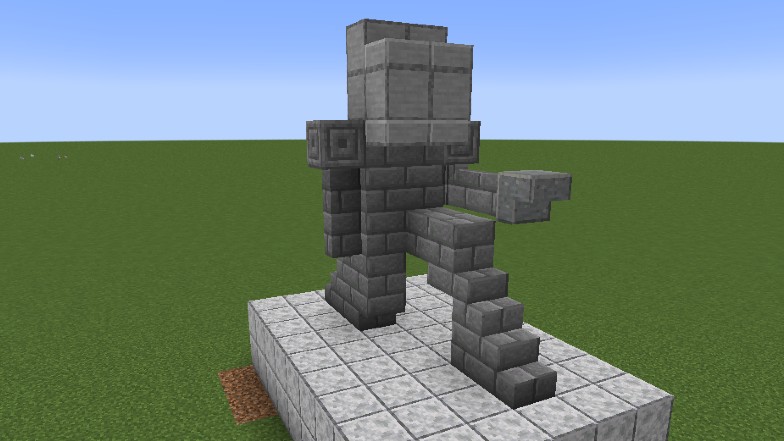
With this the statue is basically done, but you can still add plenty of details to it.
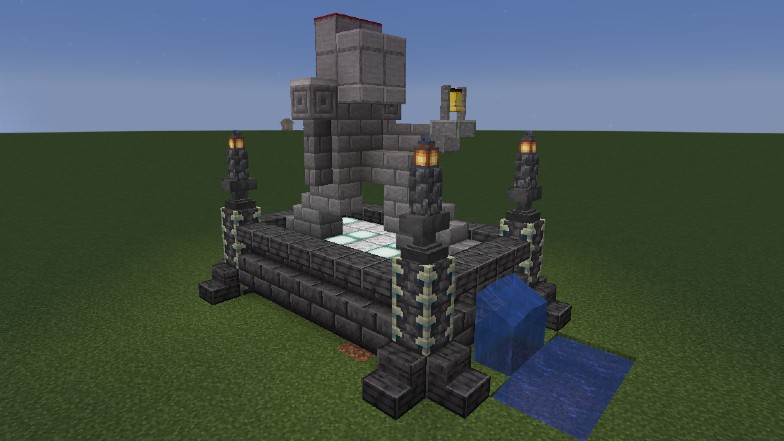
Using Banners on the back I give the statue a flowing cape and Iron Trapdoors I use to make armor shoulder pads.
Placing some kind of decoration in its hand is also a must.
Finally, I work on the statue's pedestal. This is all free game as you can give the area lights, make it look regal or natural. It is completely up to you.
Building Large Statues
The larger the Statue is the easier it is to actually make a design. Because Minecraft is a pixel game, it means that if you were to make a statue of an in-game Mob or Item, you very easily could by simply copying the pixel pattern.
The best blocks to use for these Statues are mostly Wool and Terracotta as they have all the basic colors.
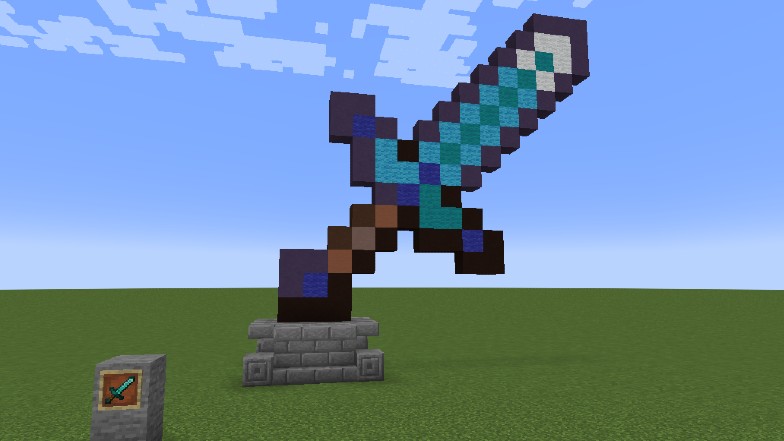
A Diamond Sword has a very distinct shape and look and this is what I am choosing to build.
First we need dimensions. We will be doing an exact 1 to 1 ratio. One pixel on the Sword's icon is going to be 1 block of our statue. This will make our statue 17 blocks tall and 17 blocks wide.
Pro tip: Put the Item in an Item Frame so you can see the colors and pixels better.
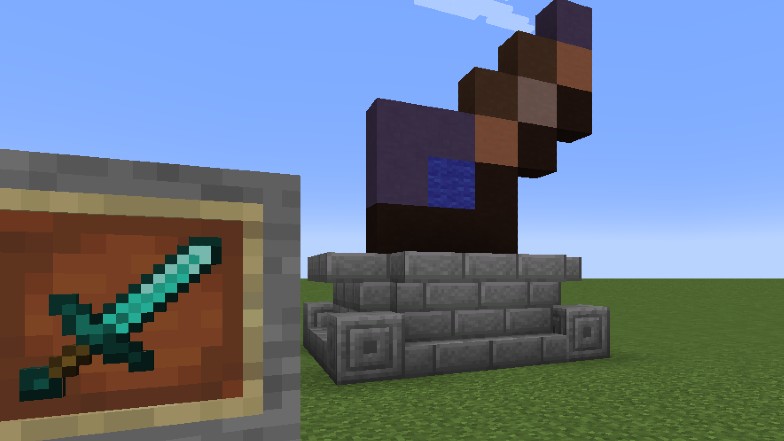
The process of making these statues is very similar to painting by numbers. All you have to do is find a block that is close to the original pixel's color and place them according to the Item.
I do make slight adjustments with colors, because I stick only to Wool and Terracotta.
Picking up more blocks will allow you to get much closer to the original color. It is just a matter of taking the time to find them.
The internet is also full of many other different patterns and designs for things that you cannot find in the game. Anything from a woodland animal to intricate pixel art. You can find these on Reddit and other Minecraft forums.
If you found this article useful for decorating your builds, but are looking for something more consider adding detailed furniture inside your bases.
Our furniture making guide will help you get started on filling in your interiors.
Source: https://diamondlobby.com/minecraft/how-to-build-a-statue-in-minecraft/
0 Response to "Dishonored Statue in Minecraft Easy Minecraft Statues Graph"
Post a Comment